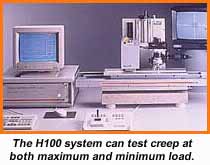
Coating measurement system software provides fast, automated testing of coating properties
Operating on Windows 95/98 or NT, the WIN-HCU software allows menu-driven programming of the measurement coordinates using the "point and shoot" function. A variety of programming options allows the distribution of desired measurement coordinates in either array or straight line formats. In addition, the software converts the Universal Hardness Value (DIN 50 359) into a Vickers Method (DIN 50 133) in the micro-hardness range (F<1.961N).

Another interesting feature of the WIN-HCU software is that it allows multiple information windows—from the directory tree of applications and measurement plot files to tables of selected material and statistical properties, it can all be opened simultaneously on the same screen. Additionally, the measurement sequence, shown either graphically or in table form as well as the video image of the measurement point, can also be added to the mix.
The unrestricted test parameter definition capability, as well as any measurement application, can be defined in Microsoft's Excel program, allowing for the information to be recorded in spreadsheet form. Users can evaluate coating characteristics using statistics, an SPC chart or a histogram and normal probability chart.
As for the actual Fischerscope H100 system, it is capable of evaluating the properties of virtually any thin coating—from very soft elastomers to ultra-hard tool coating materials. These include paint, TiN, PVD and CVD coatings, virtually all plated coatings (including gold), and plastic.
The system measures ultra-low hardness under test load (if the load range is between 0.4 and 1000 mN) and provides maximum sensitivity over a wide range of materials and coatings. In this range, test uncertainties are below one percent. Additionally, the number of incremental test load steps can be set from one to 300 with available test modes such as loading only, loading and unloading, among others.
For more information, contact Fischer Technology, Inc..
Edited by Marie Pompili
Managing Editor, Surface Finishing.com
Email: mpompili@vertical.net
+1 (440) 247-4232
The Surface Finishing.com Buyer's Guide contains listings for many different types of coating measurement instruments for finishing applications. You can visit the Buyer's Guide by clicking here www.surfacefinishing.com/BuyersGuide/
www.surfacefinishing.com/content/newsletter/add_email.asp to receive our free e-mail newsletter.
www.surfacefinishing.com/BuyersGuide/onlinecompanyreg/ for a free Buyer's Guide listing.
